Showing posts with label WordPress. Show all posts

Saturday, March 27, 2010

Add meta tag to every post in your Blogger or Wordpress Blog


Add meta tag to every post in your Blogger or Wordpress Blog
its easy to Add meta to posts in your Blogger or Wordpress Blog.
here you will find how you add meta tags to your posts inBlogger or WordPress.
In wordpress meta tags are automatically inserted in each blogger posts by using plugins like 'All in one SEO pack' but in blogger there is no such plugin but you can add meta tags manually.I will explain how you can do this.
Suppose you want to add meta tags to the post with the following link.
http://how-blogz.blogspot.com/2010/03/thesis-theme-with-wordpress-and-more.html

Replace the highlighted link of the post with your own.Replace description and keywords with the one which is relevant to your post.
If you have any problem in implementing meta tags please mention it in comments.


Read more...

How do you delete a wordpress blog

How do you delete a wordpress blog ?
How to cancel your Wordpress Blog ?
If you want to permanently delete your blog on Wordpress you can do that as the following :

To delete a blog, in your dashboard go to Settings > Delete Blog


the image show you the canceling of your WordPress Blog.


Read more...

Monday, March 22, 2010

Spam maintenance with Akismet Auntie in WordPress


Akismet Auntie Spam is a maintenance script for WordPress administrators. One of the problems with the Akismet spam protection service is that sometimes it misidentifies a real comment as spam. WordPress has a spam recovery console that I like to call the spam inbox.


Have you ever stuck your hand as far back at you can into the crannies of your couch and pulled out what you found? That’s kind of what going into the default Akismet spam inbox is like. It’s a dark and evil place, filled with things that will make your eyes burn. You only wanted to find the quarter you lost, but before you know it your hand is stuck and something is touching you back.

Akismet Auntie Spam is a kind old lady who will come to your house and give it a thorough cleaning. She’s not afraid of the dark corners, particularly the spam inbox because she knows exactly how to handle the creepy crawlies hiding out of sight.

Akismet Auntie Spam is not a WordPress plugin. It is a script for the Firefox web browser that will work with any installation of WordPress or WordPress Multi-user — that means you can use it with WordPress.com, Edublogs.org, Blogsome.com and any site that is running WordPress with Akismet. Version 2 is a complete rewrite from scratch, and it is much less complicated now. There are no knobs and buttons for users to twiddle with — it works out of the box, the same way for everyone. Auntie Spam is here for one reason and that’s to save you time.

Akismet Auntie Spam is in no way affiliated with WordPress or Auttomatic — it’s a script I created to make it a hell of a lot easier to watch out for false spam.

How to Install

Slight gotcha: if you are an old time user of Akismet Auntie Spam (from before August 2007) then you’ll want to uninstall your old version before installing the new version of the script. Find out how to uninstall a Greasemonkey script.

What Does Akismet Auntie Spam Do?

Much less time is spent navigating your spam inbox. You can see it all on one page, and it doesn’t take nearly as long to scroll through as it would without Akismet Auntie Spam installed.

  • Fetches all of your spam comments and displays them on one page.
  • Sorts spammers by the amount of spam they’ve sent.
  • Shows only the first line of spam, so less time is spent scrolling.
  • Completely hide obvious spam.
  • Automatically checks for a new version of itself every two weeks.
  • Install it once into your Firefox browser and it will work with *ALL* your WordPress blogs.

Show Me How It Works

Go to your spam inbox on your WordPress dashboard console.
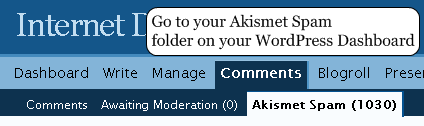
wordpress comments akismet dashboard

Auntie Spam will immediately kick in and download all of the spam at once — no navigating between 10s to 100s of individual pages of spam.
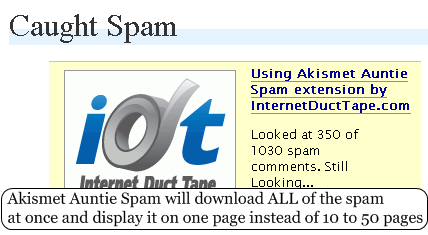
Akismet Auntie Spam will automatically download all of your spam

You can do something else like check your RSS feeds while she grabs all of your spammy comments and organizes them.
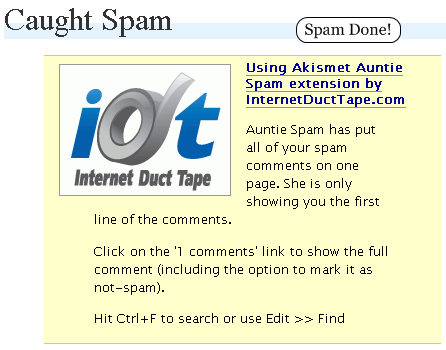
Auntie Spam has finished downloading

Spam is sorted from newest to oldest and categorized from most spammy to least spammy. She groups spam by identifying the computer it came from, so surprisingly enough the more spam you have the easier it is to look through it all. She even summarizes it all by only showing the first line.
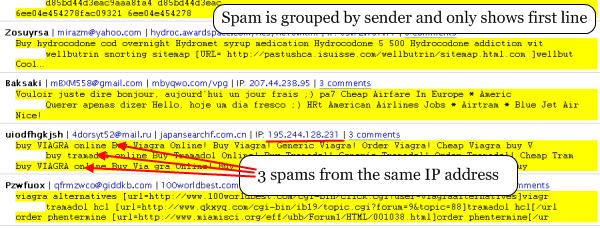
Spam is compressed - only the first line

Auntie Spam hates those idiots who keep sending you spam again and again. They can be completely ignored.
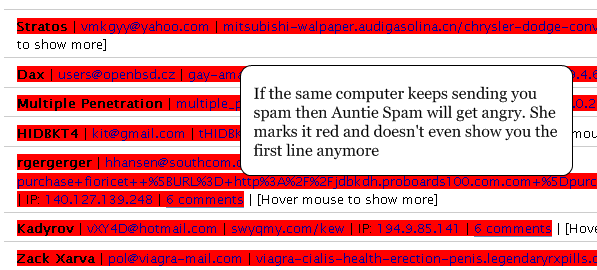
obvious spam is completely hidden

As you read through all the comment summaries, you may come across one that looks like it isn’t spam. Click on the ‘# comments’ link and Auntie Spam will show you the full text of the comment and give you the option to mark it as not spam.
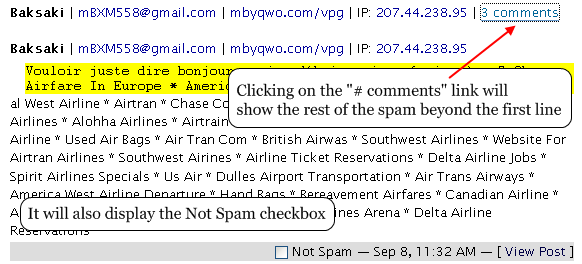
Click to see the full comment and to mark it as not spam

Once all the spam is loaded there no need to reload it all because you want to search for something specific — hit Ctrl+F and use Firefox’s built in page search.

Search from within your browser instead of using the website

When it comes to de-spamming marked comments, or deleting all comments, Auntie Spam gets out of the way and things work the same way they always have.
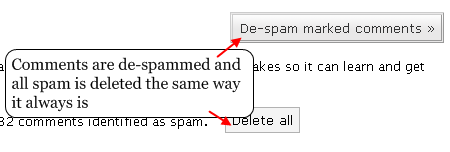
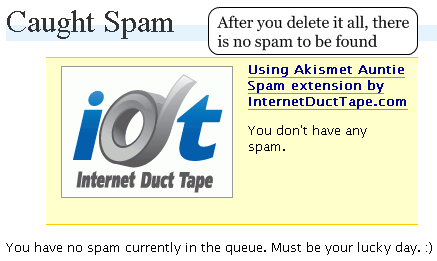
despaming or deleting all comments

all spam deleted -- no spam found

If Auntie Spam is doing something you don’t want here to, you can return to way things have always been with a single click on the Greasemonkey icon and reloading the page.
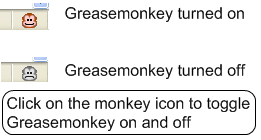
turn greasemonkey on and off

but,

What Are You Waiting For?

If you’re running WordPress and you’ve ever had to go dumpster diving for a comment that was accidentally marked as spam then you need Akismet Auntie Spam.


Read more...

Thesis Theme with WordPress and more tag options


Thesis Theme:

Is fine and new theme for wordpress, you should try it, try it one to try it all the time !
With this theme you will feel more sense !
One special chara. of it is: edite the tag !
see here :
Design Options, and Custom File Editor all are hesis Options:

also,


I love this theme, Leave comment about it !


Read more...

Sunday, March 14, 2010

Tutorial to add Google AdSense code in your wordpress blog

Tutorial to add Google AdSense code in your wordpress blog

1. Sign up for Google AdSense or any other ads provider sites.
2. login into your Google AdSense account.
3. Copy the Google AdSense code.
4. Log into wordpress.com.
5. Click "My Dashboard" in the top navigation bar.


  1. wordpress.com - My Dashboard

  2. Click "Appearance" and then click "Widgets" in the left navigation bar.

    wordpress.com - Appearance - Widgets

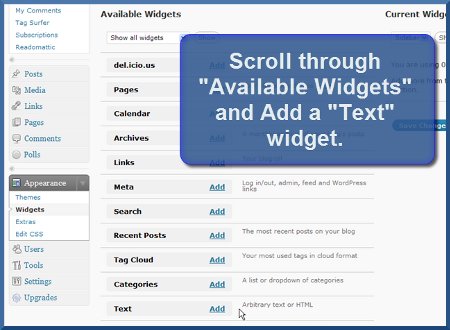
  3. In the "Available Widgets" section, add a "Text" widget.

    wordpress.com - Add Text Widget

  4. A new "Text" option will now appear under the "Current Widgets" section of your wordpress dashboard - click the "Edit" link.

    wordpress.com - Edit Text Widget

  5. Paste your StatCounter code into the main body of the Text Widget.

    [caption id="attachment_81" align="alignnone" width="300" caption="aproof.wordpress.com"]aproof.wordpress.com[/caption]

  6. Click "Done".

  7. Click "Save Changes" and that's it!


Read more...

steps to add counter to your wordpress blog

steps to add counter to your wordpress blog

  1. Sign up for a free account at StatCounter or any other counter and follow the 'Install Code' wizard to generate your StatCounter code.

  2. When prompted, make sure to choose wordpress.com (hosted by wordpress) as your Blog/Web Page Editor from the drop down list.

  3. Copy the StatCounter code.

  4. Log into wordpress.com.

  5. Click "My Dashboard" in the top navigation bar.

    wordpress.com - My Dashboard

  6. Click "Appearance" and then click "Widgets" in the left navigation bar.

    wordpress.com - Appearance - Widgets

  7. In the "Available Widgets" section, add a "Text" widget.

    wordpress.com - Add Text Widget

  8. A new "Text" option will now appear under the "Current Widgets" section of your wordpress dashboard - click the "Edit" link.

    wordpress.com - Edit Text Widget

  9. Paste your StatCounter code into the main body of the Text Widget.

    wordpress.com - Paste StatCounter Code into Text Widget

  10. Click "Done".

  11. Click "Save Changes" and that's it!

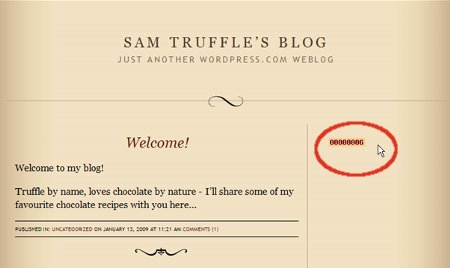
  12. Your StatCounter will now begin recording visitor information and, if you chose the visible option, your counter will be visible on your blog! (The image below shows a sample StatCounter.)

    wordpress.com - Sample StatCounter on wordpress.com

Read more...

WordPress Installation

money-aproof.wordpress.com

If you do not have the Fantastico auto installer on your account or just choose not to use it, you have the option to install WordPress manually. Please, follow the step-by-step guide below in order to activate Wordpress on your hosting account:

Manual installation of WordPress


Step 1: Download the installation file from the WordPress download section by clicking on "Download.zip" or "Download.tar.gz". This way you will get the latest stable release of the script.

Step 2: Upload it in public_html folder of your account. You can do that via FTP with a client like Filezilla or via cPanel -> File Manager -> Upload file(s). This way, after the installation is completed, the file script will appear once you visit your website.

Another option is to create a subfolder in your hosting account and upload the file in it. The WordPress installation will be accessible at:

http://www.yourdomainname.com/subfolder

Step 3: When you are in cPanel -> File Manager, navigate to the uploaded file and extract it by clicking on "Extract". The other option is to extract the file in your computer and then to upload the content in the desired folder via FTP.

Step 4: Once the files are extracted in the desired folder, you should create a MySQL database for WordPress. You can do that from cPanel -> MySQL Databases. Detailed instructions how to do so can be found in our MySQL tutorial.

Step 5: Rename wp-config-sample.php to wp-config.php and edit it. Fill in your database connection details in the following lines:

define('DB_NAME', ''); // The name of the database
define('DB_USER', ''); // Your MySQL username
define('DB_PASSWORD', ''); // ...and password

You can also change the default database prefix in order to secure your WordPress installation.

Step 6: Open in your browser:

www.yourdomainname.com/where_wordpress_is_extracted/wp-admin/install.php

This should set up the tables needed for your blog. If there is an error, double check your wp-config.php file, and try again.

Step 7: The installation procedure is finished. You can save the administrative username and the password. You will need them to access the WordPress installation admin backend in the future.
Read more...

WordPress Installation Detailed Tutorial

WordPress Installation Detailed Tutorial


Please, follow the step-by-step guide below in order to activate Wordpress on your hosting account:

Step 1: Please, login to your CPanel and locate the Fantastico De Luxe icon:

Wordpress - CPanel - Fantastico

Step 2: Find and click the WordPress link.

Wordpress installation

Step 3: Then choose New Installation:

Wordpress - New Installation

Step 4: Decide upon the location of your blog - if you would like to have it as your site front page, leave the directory box blank, otherwise fill in the appropriate folder name. Next, fill in the administrator details and the e-mail account configuration then click the Install WordPress button.

Wordpress installation folder

Step 5: A new confirmation page will be loaded for the installation. Click the Finish Installation button if no errors are reported.

Wordpress - Finish Installation

If else you will have to go back and rectify the specified issues.

Step 6: After completing the installation the final screen will load, providing you with the installation details. You will be able to e-mail the details to a specified address also in order to keep them for future reference.

Wordpress - installation successful

Well done! You have successfully installed the Wordpress application!
Read more...